 WYAE.de - IT Security, KnowHow & Software
Stehtisch / Standing Desk
( english version below )
Wenn man erst einmal einige Jahre an Schreibtischen gesessen hat, und gesessen, und gesessen, dann will irgendwann der Rücken nicht mehr ganz so, wie man es gerne hätte. Und dann hilft es enorm, die Schreibtischposition einfach ändern zu können.
Dummerweise sind Schreibtische, bei denen man die Position elektrisch verstellen kann echt sch...iemlich teuer. Daher habe ich mir einen selber gebaut - bei dem ein Wechsel der Arbeitsposition auch noch schnell und einfach ist:
Wandregal als Stehtisch
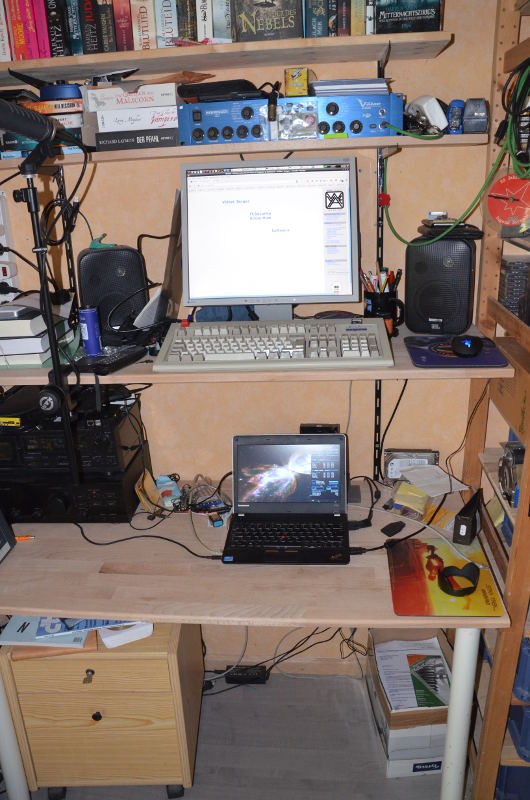
Das Material:
- 2 Regalschienen, ca. 2m lang/hoch
- 2 Regalhaken 40cm
- Schreibtischbrett 40cm tief - für oberen Schreibtisch
- 2 Regalwinkel (nicht -haken!) 60cm lang
- Schreibtischbrett 60cm tief - für unteren Schreibtisch
- 2 Tischfüße 70cm lang/hoch
- mehrere Regalhaken und Regalbretter 20cm tief - für die Regale oberhalb des Monitors
Kurze Bauanleitung:
- Regalschienen mit reichlich Schrauben und Dübeln an die Wand schrauben, so dass die 60cm-Regalwinkel (Oberkante) gleich hoch wie die Füße sind
- untere Regalhaken einhängen, untere Tischplatte auflegen, anschrauben, vorne/außen die Tischbeine anschrauben
- ca. 40-45cm darhüber (Oberkante) die Regalhaken für oberen Schreibtisch einhägen, oberes Schreibtischbrett darauflegen & befestigen
- Laptop unten aufstellen, oben Monitor & Tastatur - rechts der oberen Schreibtischplatte sollte ein wenig Luft sein, damit das Mauskabel daneben passt und man die Maus einfach von unten nach oben mitnehmen kann (bzw. umgekehrt)
- oberhalb der Tastatur Regale anbringen nach Bedarf
Standalone / Office-kompatibel
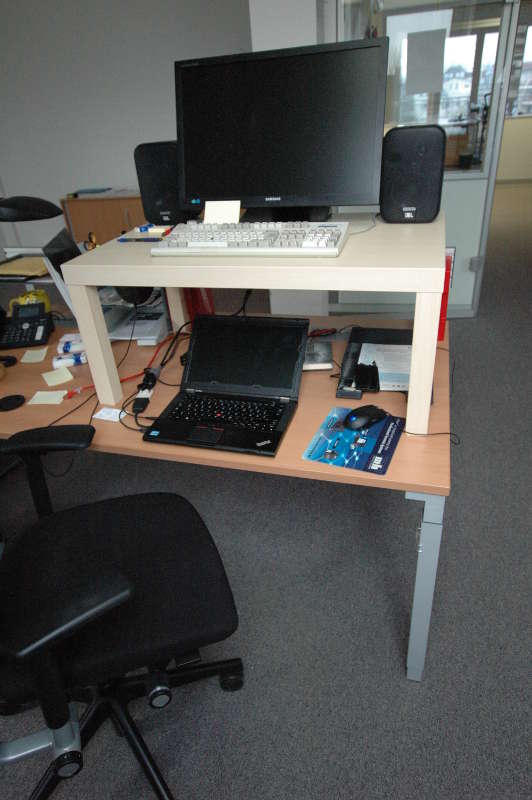
Hier eine andere Variante, die aufgrund des einfachen Auf- und Abbaus auch bürokompatibel ist:
- der normale Schreibtisch, mindestens 70cm tief (ideal, wenn der hinten eine Schiene hat - dann kann nichts herunterfallen)
- IKEA "Lack" Beistelltisch LxHxT 90x45x55cm
- Säge, Leim
Kurze Bauanleitung:
- die Füße des LACK Beistelltisches unten um 5cm kürzen: unten absägen, Einsatz/Fuß "auspellen" und in gekürzten Fuß einleimen
- den LACK Beistelltisch ohne Zeitschriftenablage aufbauen
- ...und um ca. 20cm nach hinten versetzt auf den regulären Schreibtisch stellen.
- Laptop unten aufstellen, oben Monitor & Tastatur - die Maus nimmt man einfach je nach Bedarf von unten nach oben mitnehmen kann (bzw. umgekehrt)
IVAR Stehregal / Built into IVAR shelf
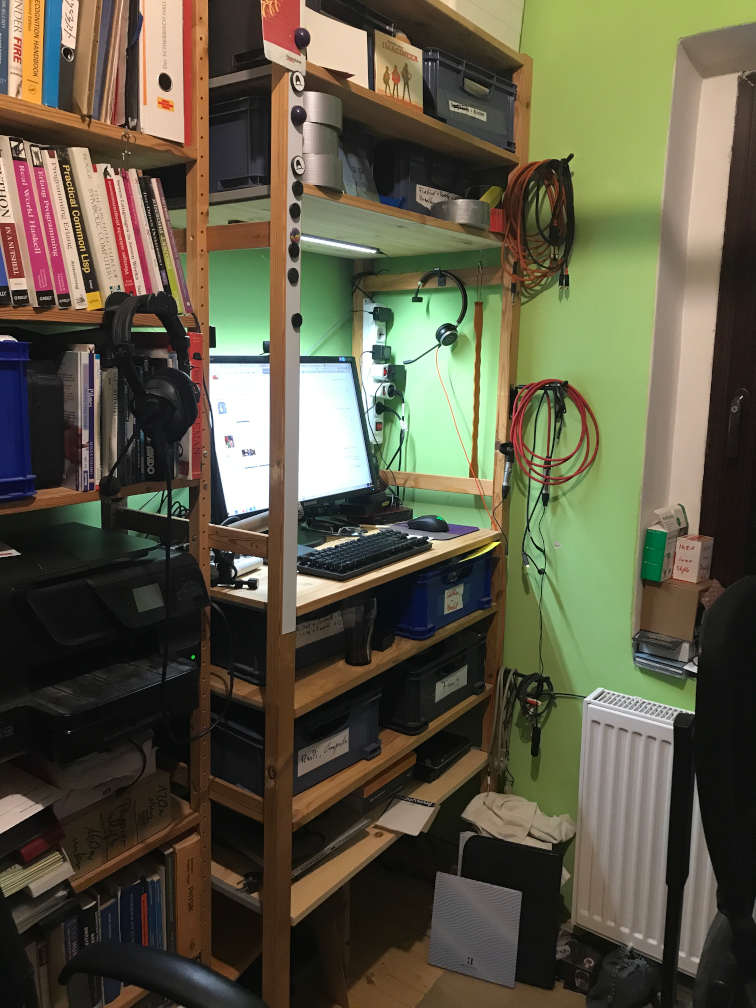
Manchmal sind einfache Ideen einfach: ein 83x50cm Ikea IVAR Regal, als "Schreibtisch" ein Boden auf Ellbogenhöhe, der Rest als Regal. An das "Decken"brett eine LED-Leuchte als Schreibtischlampe. Gegenüber ein "normaler" Schreibtisch (man sieht gerade noch den Stuhl). Der Laptop ist mit einem 3m USB-C Kabel an die Docking-Station (hinten unter'm Monitor) angebunden.
Bonus: die sehr praktische, umstoßsichere Stellfläche für Gläser oder Teetassen direkt unmterhalb des "Schreibtisches".
Schreibtisch und IVAR Stehregal / Desk and IVAR shelf
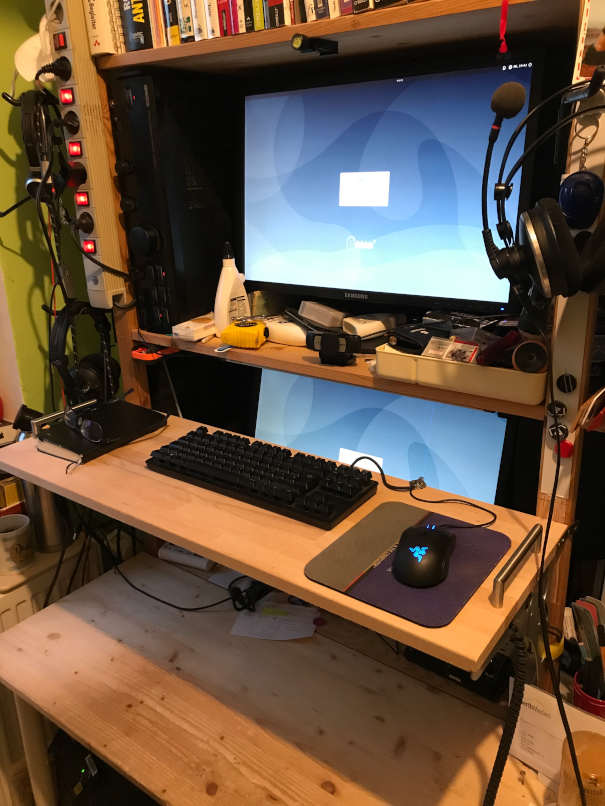
Da in der vorherigen Iteration oben gezeigte Ikea IVAR Regal zu wenig Platz zwischen den Computertischen ließ habe ich nun alles auf eine Seite konsolidiert (das "dicke" IVAR wird abgebaut).
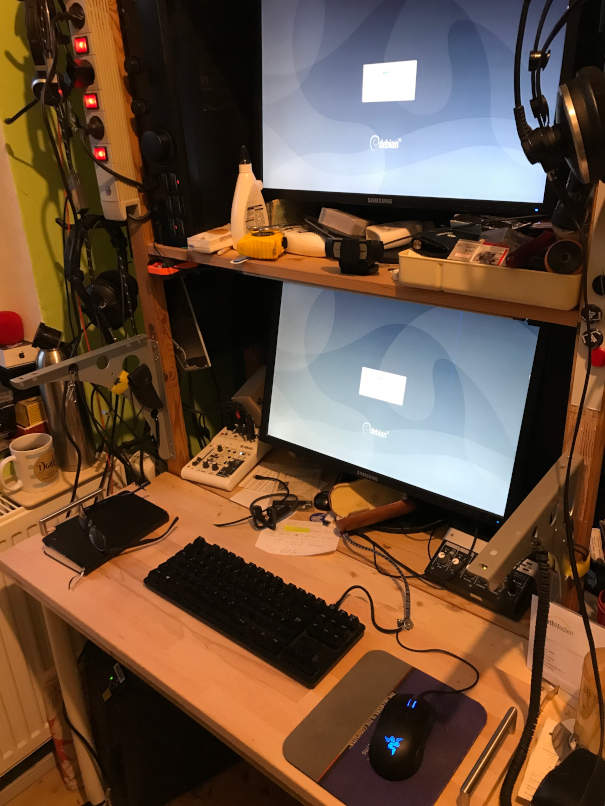
Tastatur + Maus sind auf einem Arbeitsbrett (90x30cm), das je nach Wunsch auf dem Schreibtisch liegt oder auf Regalhalen 40cm höher gelegt wird. Das Bild wird auf beide Monitore gespiegelt.
Ein Ändern der Position ist Klassen schneller als alle elektrischen Schreibtische.
ENGLISH
When you have sat on a desk for some years, and sat, and sat, at one point in time your back will no longer budge unter your sitting and complain. And then it helps a lot if you can change your work position easily.
Unfortunately desks that can change in height easily/electrically are often prohibitively expensive. So I built one myself - one, where you do not have to wait for some motor to catch up.
Wall-mounted standing desk
Material needed:
- 2 shelf rails, ca. 2m long
- 2 shelf hooks 40cm deep
- upper desk board, ca. 40cm deep
- 2 heavy-duty shelf hooks 60cm deep
- lower desk board 60cm deep
- 2 desk feet ca. 70 height
- multiple shelf hooks and boards 20cm deep as needed for the shelves above the monitor
Brief building instructions:
- Solidly bolt the shelf rails to the wall so the upper end of the 60cm shelf rails are on the same height as the desk feet.
- Attach the 60cm shelf hooks to the rails, screw the lower desk board to the shelf hooks and screw the desk feet under the outer/front part of the (lower) desk.
- Attach the 40cm shelf hooks ca. 40-45cm above the lower desk, fix the upper desk board to those.
- Place laptop on the lower desk, monitor and keyboard on the upper one. Please leave a small bit of space right of the desk board for the mouse cable - so you can take the mouse with you whenever you stand up / sit down.
- Attach additional shelf boards above the monitor as needed.
Office-compatible desk extension
Here a different version, which is office-compatible as it is very easy and nondestructive to build/remove:
- The regular employer-supplied desk, at least 70cm deep (it's ideal if it has a rail/limit at the back so the upper table cannot be pushed too far)
- IKEA "Lack" coffee table LxHxD 90x45x55cm
- Saw, glue
Brief building instructions:
- Saw off the lower 5cm off the LACK table legs, unprowl the foot end from the 5cm end and glue it into the respective foot..
- Build up the LACK coffee table according to instructions - but no not attach the magazine tray/board.
- Place the LACK table onto the desk, pushed back approximately by 20cm.
- Place laptop on the lower desk, monitor and keyboard on the upper one. You can take the mouse with you whenever you stand up / sit down.
Seems, someone had a similar idea: Colin Nederkoorn and Ryan Witt's "Ikea Standing Desk".
IVAR shelf as standing desk
Sometimes simple ideas are simple: a standard 83x50cm Ikea IVAR shelf, place one shelf board at ellbow height, use the remainder as shelf. On the "ceiling" shelf board an LED strip is used as desk lamp. Right opposite of it there is a "standard" desk (you just can see the office chair on the right). The laptop is connected via a 3m / 10ft USB-C cable to the docking station that you can barely see below the far corner of the monitor.
Bonus: the very convenient placement of drinking glasses / tea cups out of tripping/spilling danger right below the "desk" board. ### Desk and IVAR shelf 
The Ikea IVAR shelf shown in the prior example leaves a little too little space to properly stand unhindered. So I consolidated both places into one (the "thick" IVAR behind the chair will be torn down soon).
Mouse + keyboard are placed on a tablet/shelf (90x30cm) which can be lain down onto the original desk or placed on the shelf brackets attached to the IVAR shelf rack (ca. 40 cm above the desk).
Changing positions is faster by orders of magnitude than with any motorized desk.